
3.3: Composition
- Page ID
- 25395
\( \newcommand{\vecs}[1]{\overset { \scriptstyle \rightharpoonup} {\mathbf{#1}} } \)
\( \newcommand{\vecd}[1]{\overset{-\!-\!\rightharpoonup}{\vphantom{a}\smash {#1}}} \)
\( \newcommand{\id}{\mathrm{id}}\) \( \newcommand{\Span}{\mathrm{span}}\)
( \newcommand{\kernel}{\mathrm{null}\,}\) \( \newcommand{\range}{\mathrm{range}\,}\)
\( \newcommand{\RealPart}{\mathrm{Re}}\) \( \newcommand{\ImaginaryPart}{\mathrm{Im}}\)
\( \newcommand{\Argument}{\mathrm{Arg}}\) \( \newcommand{\norm}[1]{\| #1 \|}\)
\( \newcommand{\inner}[2]{\langle #1, #2 \rangle}\)
\( \newcommand{\Span}{\mathrm{span}}\)
\( \newcommand{\id}{\mathrm{id}}\)
\( \newcommand{\Span}{\mathrm{span}}\)
\( \newcommand{\kernel}{\mathrm{null}\,}\)
\( \newcommand{\range}{\mathrm{range}\,}\)
\( \newcommand{\RealPart}{\mathrm{Re}}\)
\( \newcommand{\ImaginaryPart}{\mathrm{Im}}\)
\( \newcommand{\Argument}{\mathrm{Arg}}\)
\( \newcommand{\norm}[1]{\| #1 \|}\)
\( \newcommand{\inner}[2]{\langle #1, #2 \rangle}\)
\( \newcommand{\Span}{\mathrm{span}}\) \( \newcommand{\AA}{\unicode[.8,0]{x212B}}\)
\( \newcommand{\vectorA}[1]{\vec{#1}} % arrow\)
\( \newcommand{\vectorAt}[1]{\vec{\text{#1}}} % arrow\)
\( \newcommand{\vectorB}[1]{\overset { \scriptstyle \rightharpoonup} {\mathbf{#1}} } \)
\( \newcommand{\vectorC}[1]{\textbf{#1}} \)
\( \newcommand{\vectorD}[1]{\overrightarrow{#1}} \)
\( \newcommand{\vectorDt}[1]{\overrightarrow{\text{#1}}} \)
\( \newcommand{\vectE}[1]{\overset{-\!-\!\rightharpoonup}{\vphantom{a}\smash{\mathbf {#1}}}} \)
\( \newcommand{\vecs}[1]{\overset { \scriptstyle \rightharpoonup} {\mathbf{#1}} } \)
\( \newcommand{\vecd}[1]{\overset{-\!-\!\rightharpoonup}{\vphantom{a}\smash {#1}}} \)
We will explore composition in more detail when we discuss different types of sedimentary rocks. But for now, its worth mentioning that:
- No matter the scheme you use, the major subdivisions of sedimentary rocks are based on their composition. This includes sub-types like carbonates (made of carbonate minerals), siliclastic sedimentary rocks (made of transported particles that came to rest when flow ceased), biochemical sedimentary rocks (made of things derived from- or associated with living organisms), etc.

Figure \(\PageIndex{1}\): The primary subtypes of sedimentary rocks are defined based on their grain size and their composition (Virginia Sisson via Pressbooks; CC BY-NC-SA 4.0)
- The composition of sedimentary rocks influences everything from chemical reactions with fluids in the subsurface to nutrient values in soil.
- Composition is influenced by a variety of factors including composition of the source rock as well as the amount/type/duration of weathering the sediment experienced, and the cumulative amount of energy that the sediment was exposed to during transport.
- Geologists tend to classify sandstones based on the relative abundance of quartz, feldspar, and lithic (rock) fragments and keep an eye out for important accessory minerals like mica, magnetite, clay minerals, etc. Although the petrographic microscope is the ideal tool for looking at the mineralogy of sandstones, you can make some very educated guesses using 10x magnification via a hand lens or binocular microscope. Point counting hundreds of grains can provide valuable quantitative data, but quick visual estimates of abundance can also be of value (especially with practice).
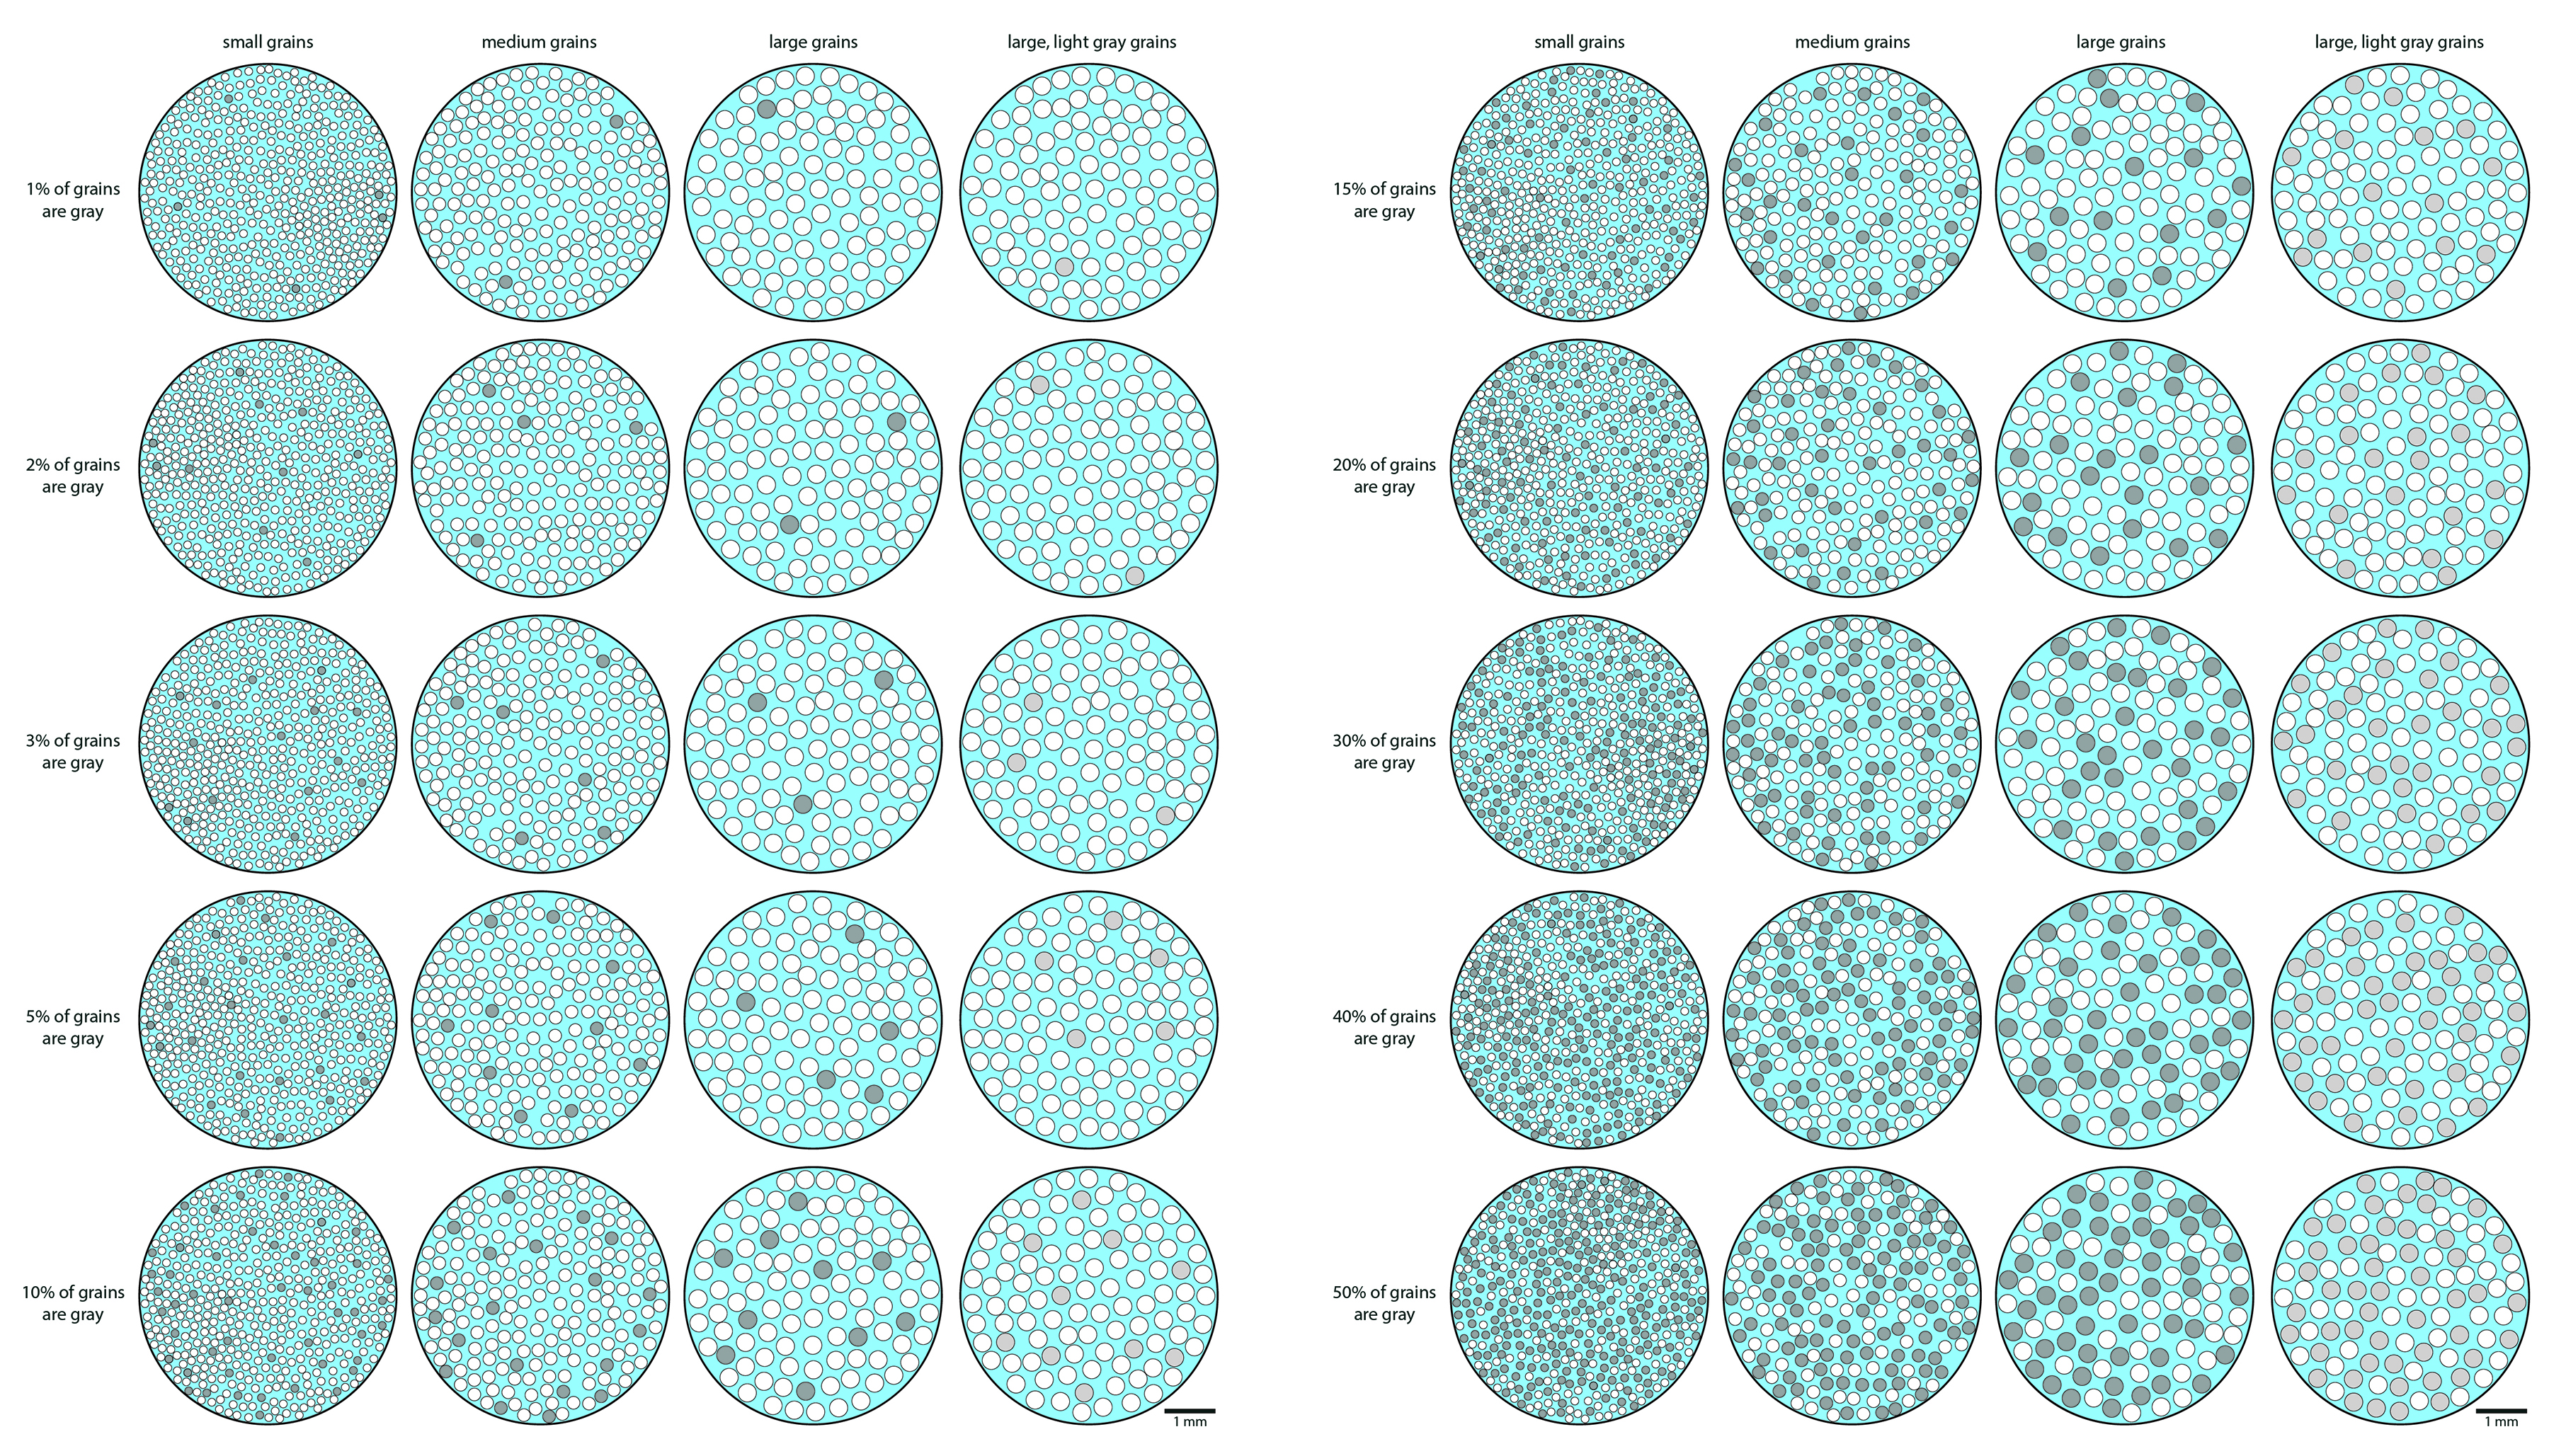
Figure \(\PageIndex{2}\): Visual guides for estimating grain abundance (Michael C. Rygel via Wikimedia Commons; CC BY-SA 4.0)