
6.1.8: Shoreline Environments (Chapter 13)
- Page ID
- 4319
\( \newcommand{\vecs}[1]{\overset { \scriptstyle \rightharpoonup} {\mathbf{#1}} } \)
\( \newcommand{\vecd}[1]{\overset{-\!-\!\rightharpoonup}{\vphantom{a}\smash {#1}}} \)
\( \newcommand{\id}{\mathrm{id}}\) \( \newcommand{\Span}{\mathrm{span}}\)
( \newcommand{\kernel}{\mathrm{null}\,}\) \( \newcommand{\range}{\mathrm{range}\,}\)
\( \newcommand{\RealPart}{\mathrm{Re}}\) \( \newcommand{\ImaginaryPart}{\mathrm{Im}}\)
\( \newcommand{\Argument}{\mathrm{Arg}}\) \( \newcommand{\norm}[1]{\| #1 \|}\)
\( \newcommand{\inner}[2]{\langle #1, #2 \rangle}\)
\( \newcommand{\Span}{\mathrm{span}}\)
\( \newcommand{\id}{\mathrm{id}}\)
\( \newcommand{\Span}{\mathrm{span}}\)
\( \newcommand{\kernel}{\mathrm{null}\,}\)
\( \newcommand{\range}{\mathrm{range}\,}\)
\( \newcommand{\RealPart}{\mathrm{Re}}\)
\( \newcommand{\ImaginaryPart}{\mathrm{Im}}\)
\( \newcommand{\Argument}{\mathrm{Arg}}\)
\( \newcommand{\norm}[1]{\| #1 \|}\)
\( \newcommand{\inner}[2]{\langle #1, #2 \rangle}\)
\( \newcommand{\Span}{\mathrm{span}}\) \( \newcommand{\AA}{\unicode[.8,0]{x212B}}\)
\( \newcommand{\vectorA}[1]{\vec{#1}} % arrow\)
\( \newcommand{\vectorAt}[1]{\vec{\text{#1}}} % arrow\)
\( \newcommand{\vectorB}[1]{\overset { \scriptstyle \rightharpoonup} {\mathbf{#1}} } \)
\( \newcommand{\vectorC}[1]{\textbf{#1}} \)
\( \newcommand{\vectorD}[1]{\overrightarrow{#1}} \)
\( \newcommand{\vectorDt}[1]{\overrightarrow{\text{#1}}} \)
\( \newcommand{\vectE}[1]{\overset{-\!-\!\rightharpoonup}{\vphantom{a}\smash{\mathbf {#1}}}} \)
\( \newcommand{\vecs}[1]{\overset { \scriptstyle \rightharpoonup} {\mathbf{#1}} } \)
\( \newcommand{\vecd}[1]{\overset{-\!-\!\rightharpoonup}{\vphantom{a}\smash {#1}}} \)
\(\newcommand{\avec}{\mathbf a}\) \(\newcommand{\bvec}{\mathbf b}\) \(\newcommand{\cvec}{\mathbf c}\) \(\newcommand{\dvec}{\mathbf d}\) \(\newcommand{\dtil}{\widetilde{\mathbf d}}\) \(\newcommand{\evec}{\mathbf e}\) \(\newcommand{\fvec}{\mathbf f}\) \(\newcommand{\nvec}{\mathbf n}\) \(\newcommand{\pvec}{\mathbf p}\) \(\newcommand{\qvec}{\mathbf q}\) \(\newcommand{\svec}{\mathbf s}\) \(\newcommand{\tvec}{\mathbf t}\) \(\newcommand{\uvec}{\mathbf u}\) \(\newcommand{\vvec}{\mathbf v}\) \(\newcommand{\wvec}{\mathbf w}\) \(\newcommand{\xvec}{\mathbf x}\) \(\newcommand{\yvec}{\mathbf y}\) \(\newcommand{\zvec}{\mathbf z}\) \(\newcommand{\rvec}{\mathbf r}\) \(\newcommand{\mvec}{\mathbf m}\) \(\newcommand{\zerovec}{\mathbf 0}\) \(\newcommand{\onevec}{\mathbf 1}\) \(\newcommand{\real}{\mathbb R}\) \(\newcommand{\twovec}[2]{\left[\begin{array}{r}#1 \\ #2 \end{array}\right]}\) \(\newcommand{\ctwovec}[2]{\left[\begin{array}{c}#1 \\ #2 \end{array}\right]}\) \(\newcommand{\threevec}[3]{\left[\begin{array}{r}#1 \\ #2 \\ #3 \end{array}\right]}\) \(\newcommand{\cthreevec}[3]{\left[\begin{array}{c}#1 \\ #2 \\ #3 \end{array}\right]}\) \(\newcommand{\fourvec}[4]{\left[\begin{array}{r}#1 \\ #2 \\ #3 \\ #4 \end{array}\right]}\) \(\newcommand{\cfourvec}[4]{\left[\begin{array}{c}#1 \\ #2 \\ #3 \\ #4 \end{array}\right]}\) \(\newcommand{\fivevec}[5]{\left[\begin{array}{r}#1 \\ #2 \\ #3 \\ #4 \\ #5 \\ \end{array}\right]}\) \(\newcommand{\cfivevec}[5]{\left[\begin{array}{c}#1 \\ #2 \\ #3 \\ #4 \\ #5 \\ \end{array}\right]}\) \(\newcommand{\mattwo}[4]{\left[\begin{array}{rr}#1 \amp #2 \\ #3 \amp #4 \\ \end{array}\right]}\) \(\newcommand{\laspan}[1]{\text{Span}\{#1\}}\) \(\newcommand{\bcal}{\cal B}\) \(\newcommand{\ccal}{\cal C}\) \(\newcommand{\scal}{\cal S}\) \(\newcommand{\wcal}{\cal W}\) \(\newcommand{\ecal}{\cal E}\) \(\newcommand{\coords}[2]{\left\{#1\right\}_{#2}}\) \(\newcommand{\gray}[1]{\color{gray}{#1}}\) \(\newcommand{\lgray}[1]{\color{lightgray}{#1}}\) \(\newcommand{\rank}{\operatorname{rank}}\) \(\newcommand{\row}{\text{Row}}\) \(\newcommand{\col}{\text{Col}}\) \(\renewcommand{\row}{\text{Row}}\) \(\newcommand{\nul}{\text{Nul}}\) \(\newcommand{\var}{\text{Var}}\) \(\newcommand{\corr}{\text{corr}}\) \(\newcommand{\len}[1]{\left|#1\right|}\) \(\newcommand{\bbar}{\overline{\bvec}}\) \(\newcommand{\bhat}{\widehat{\bvec}}\) \(\newcommand{\bperp}{\bvec^\perp}\) \(\newcommand{\xhat}{\widehat{\xvec}}\) \(\newcommand{\vhat}{\widehat{\vvec}}\) \(\newcommand{\uhat}{\widehat{\uvec}}\) \(\newcommand{\what}{\widehat{\wvec}}\) \(\newcommand{\Sighat}{\widehat{\Sigma}}\) \(\newcommand{\lt}{<}\) \(\newcommand{\gt}{>}\) \(\newcommand{\amp}{&}\) \(\definecolor{fillinmathshade}{gray}{0.9}\)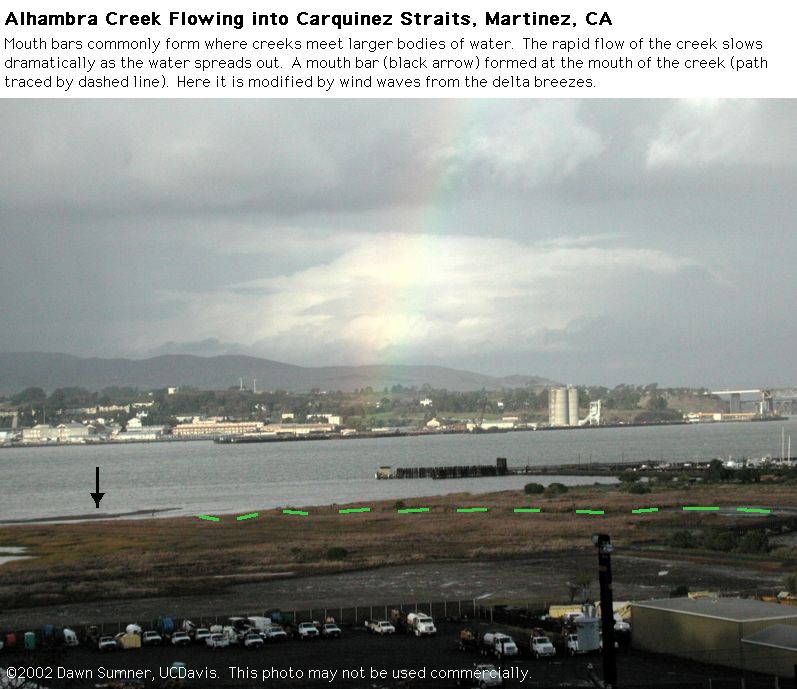
Figure \(\PageIndex{1}\): Mouth bar from a creek flowing into brackish water straits (California)
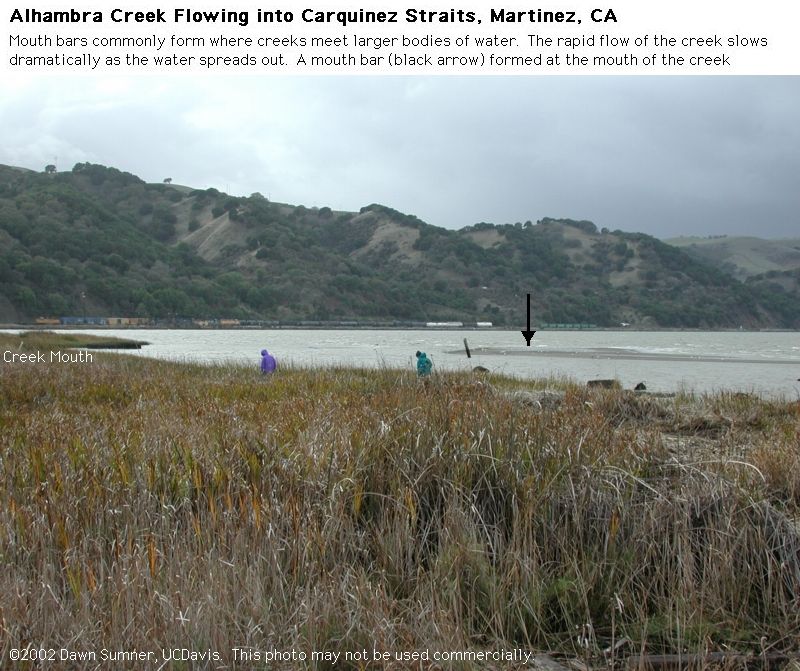
Figure \(\PageIndex{2}\): Mouth bar from a creek flowing into brackish water straits (California)
Large sections of the central California coast are mostly erosional with substantial cliffs.
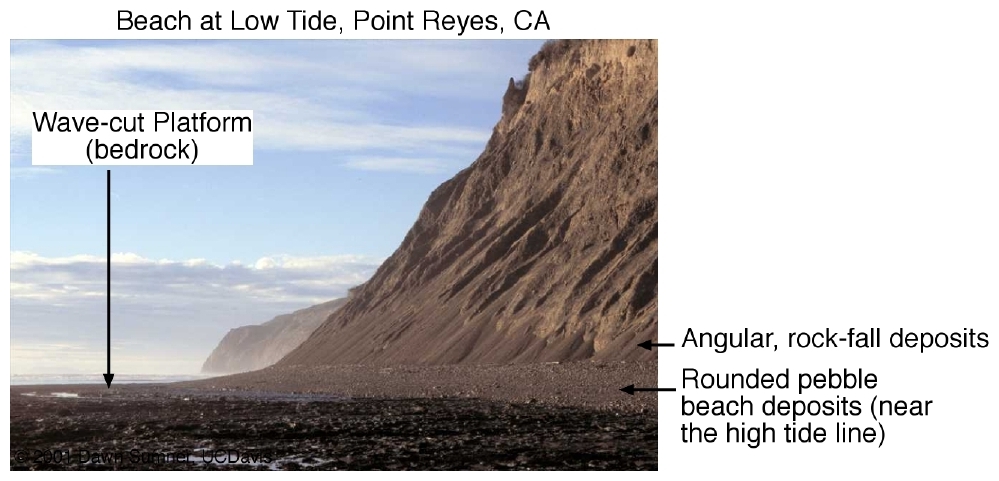
Figure \(\PageIndex{3}\): Modern Wave Cut Platform
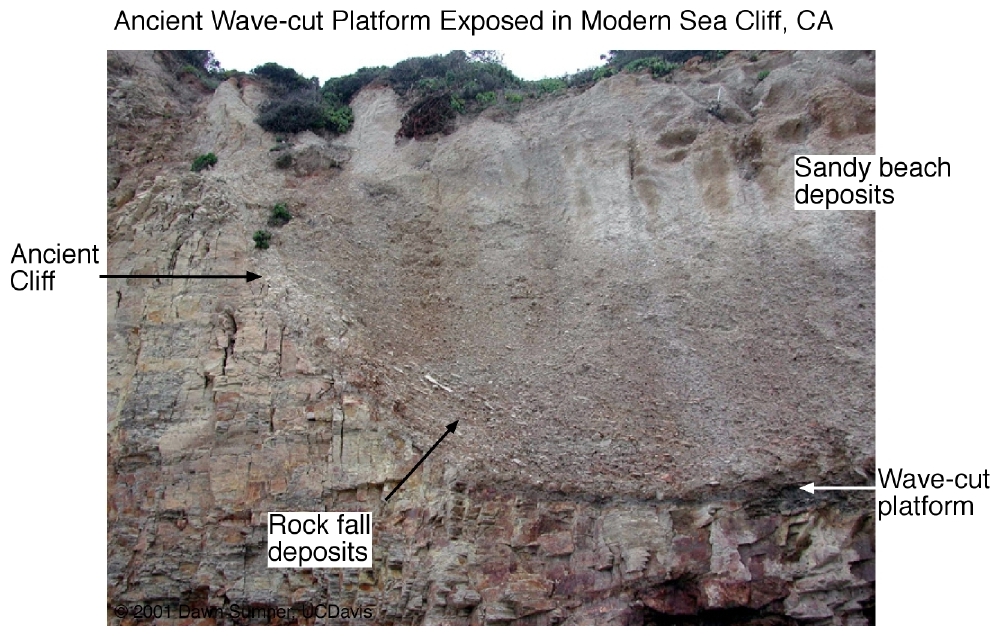
Figure \(\PageIndex{4}\): Ancient Wave Cut Platform
Return to Sedimentary Environments
Scott Creek Beach
Scott Creek Beach, CA, is a wave and storm dominated beach. The following photos were taken near low tide. We go to this beach on the second field trip.
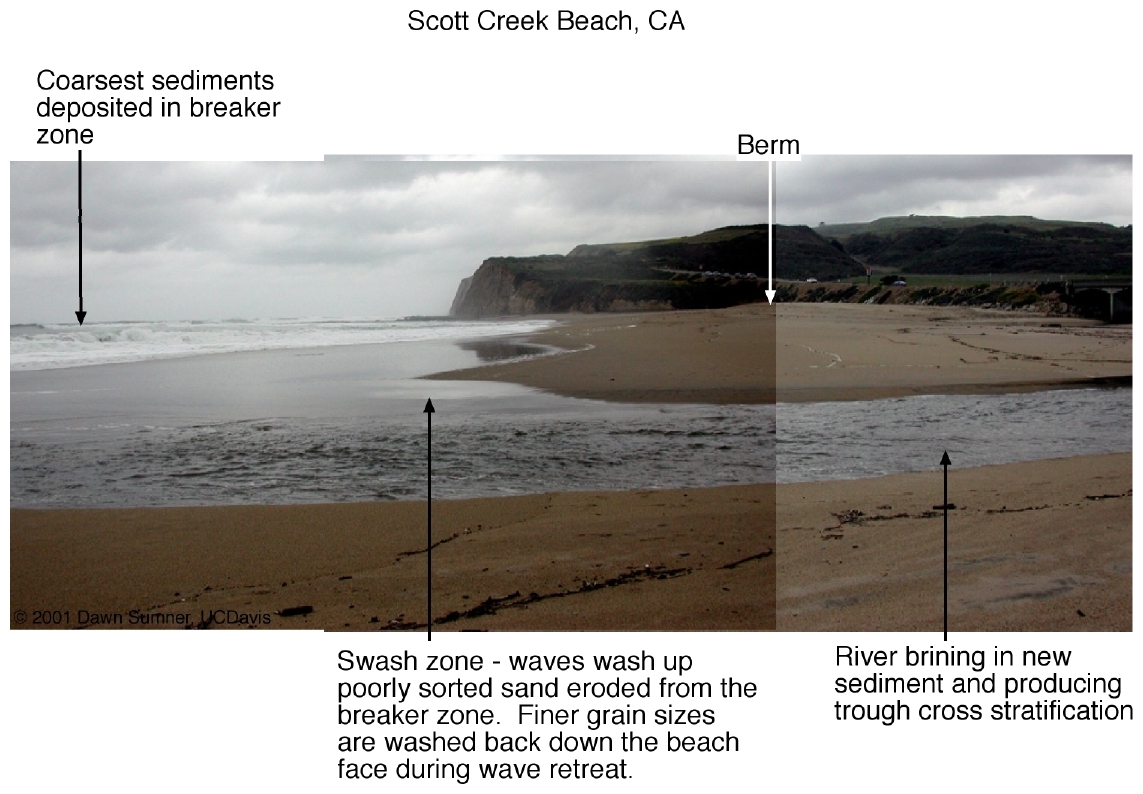
Figure \(\PageIndex{5}\): Scott Creek Beach
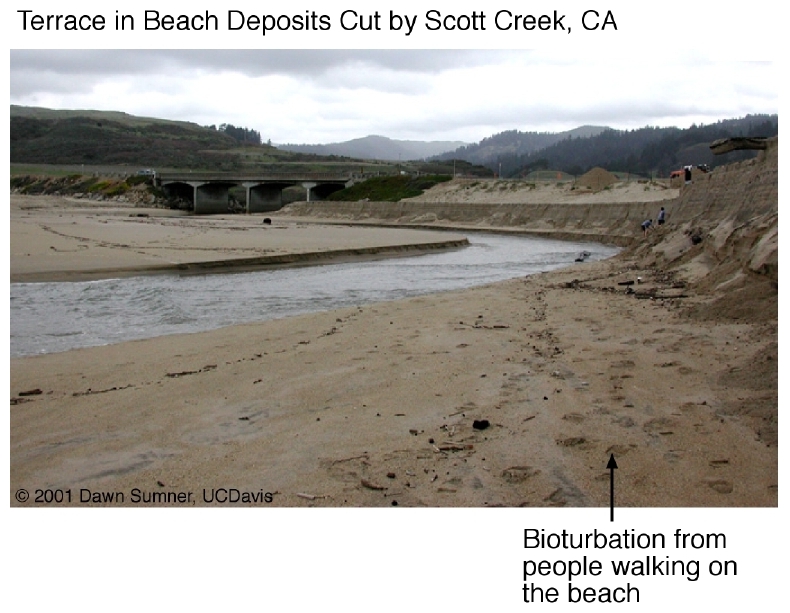
Figure \(\PageIndex{6}\): Terrace at Scott Creek Beach
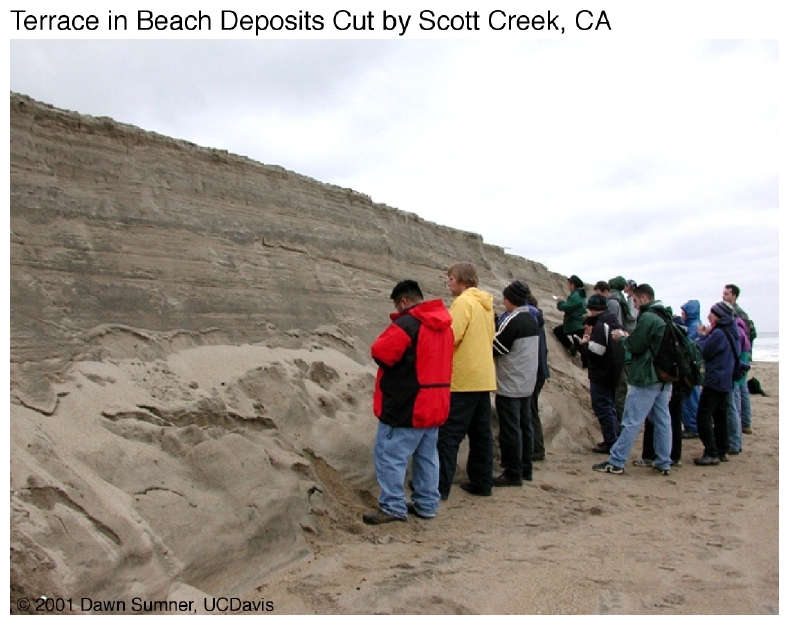
Figure \(\PageIndex{7}\): Beach Stratification
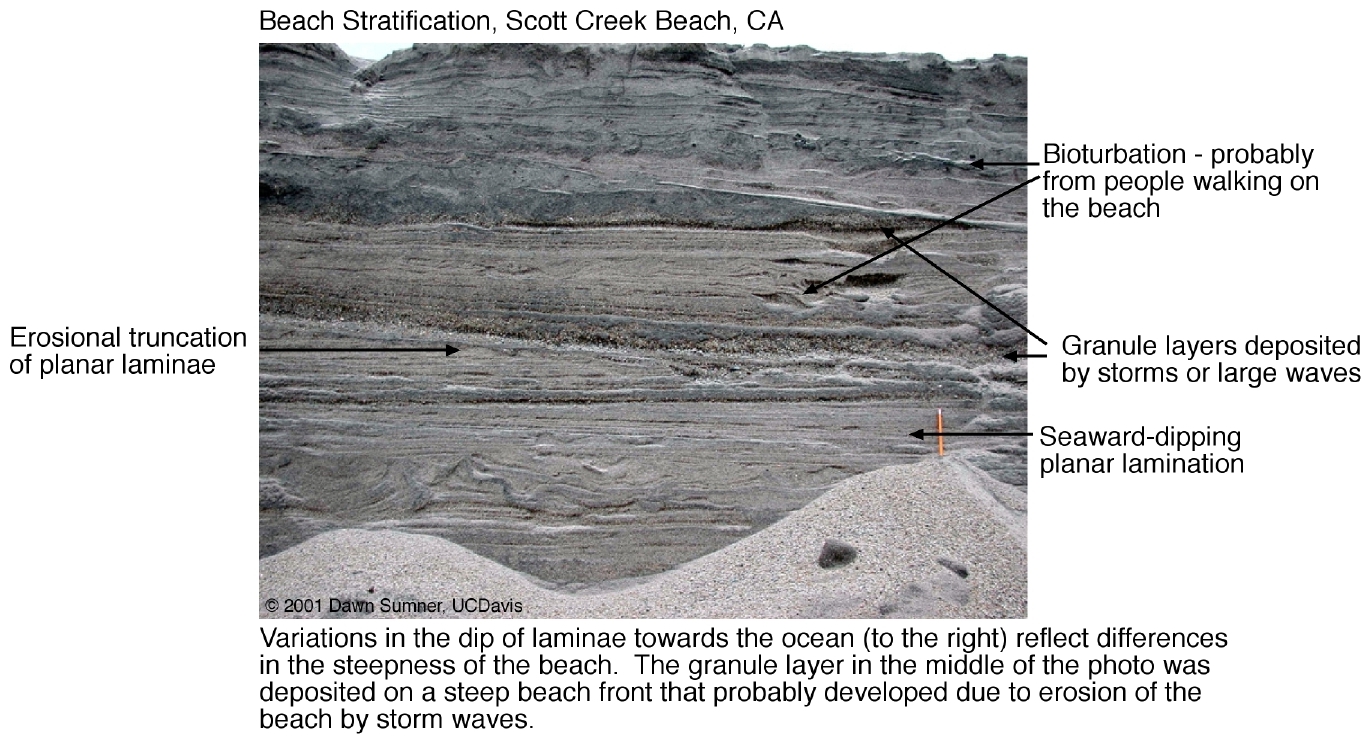
Figure \(\PageIndex{8}\): Beach Stratification
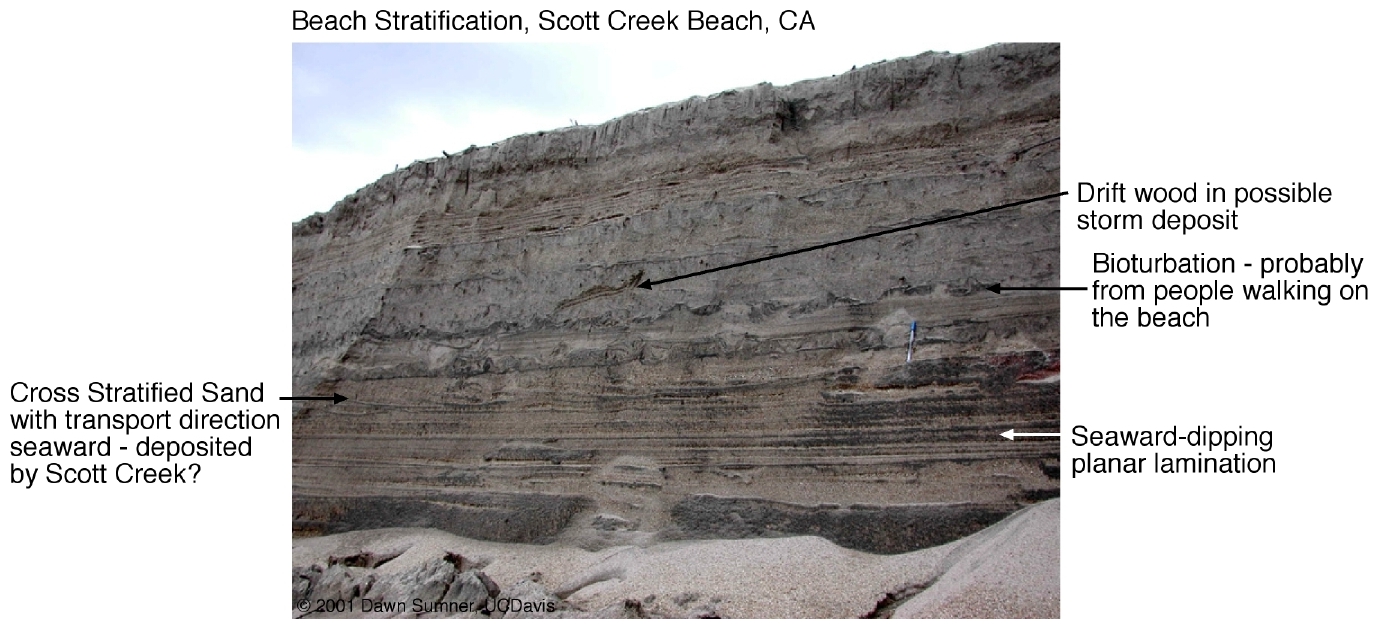
Figure \(\PageIndex{9}\): Beach Stratification
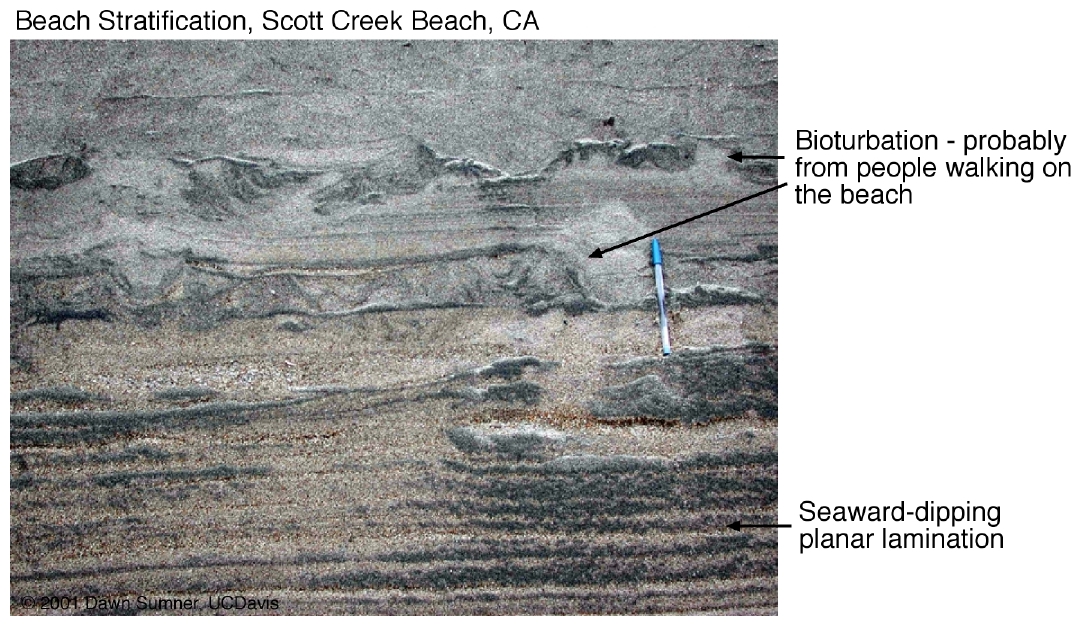
Figure \(\PageIndex{10}\): Beach Stratification
The first photo shows beach stratification along the beach, whereas the next photo shows strata deposited at about the same time, but in a terrace perpendicular to the beach. Note how the laminae appear much more parallel in the first photo. This is because the main slope of the beach is towards the ocean. When looking in the rock record, it is important to understand the 3-D geometry of deposits for the best interpretations.
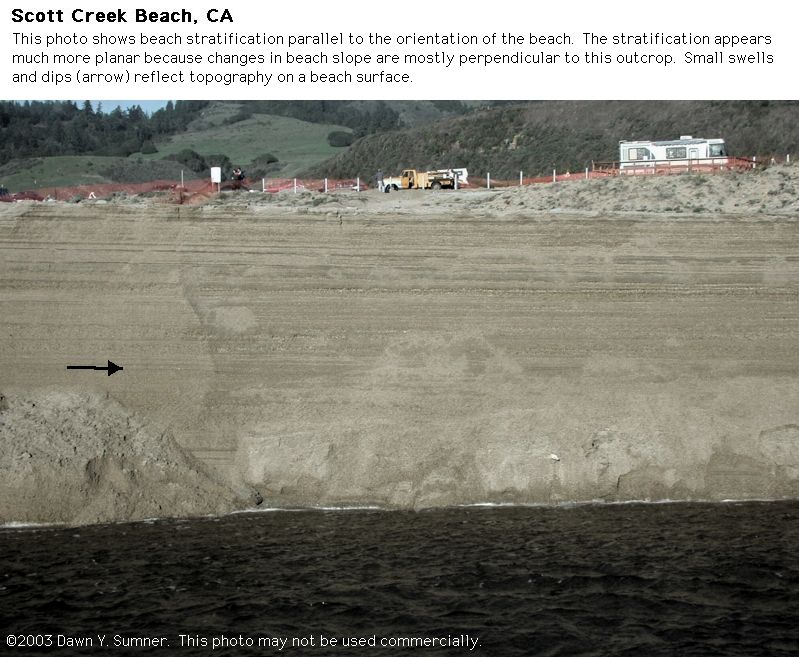
Figure \(\PageIndex{11}\): Beach Stratification
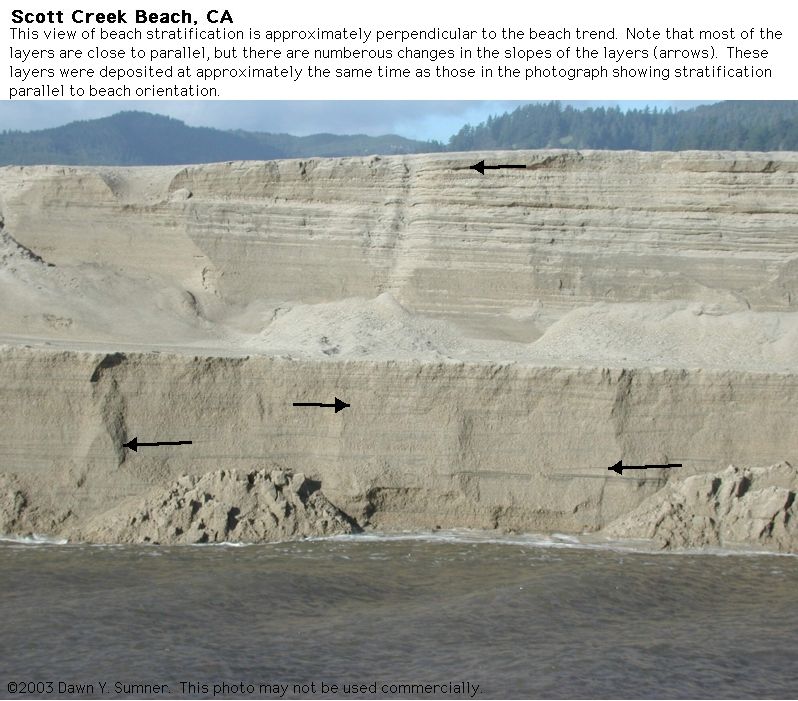
Figure \(\PageIndex{12}\): Beach Stratification
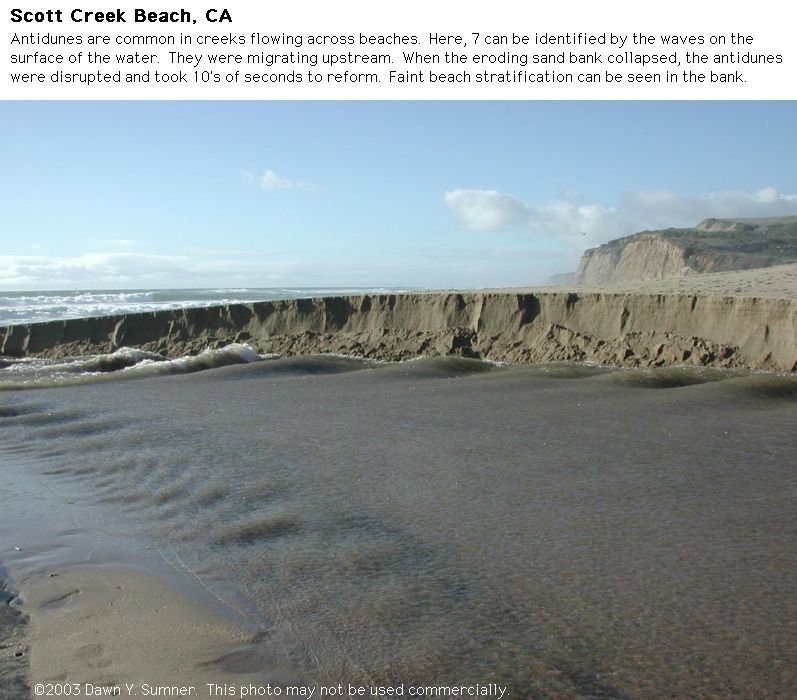
Figure \(\PageIndex{13}\): Antidunes in a creek
Return to Sedimentary Environments
This Brazilian beach is also wave dominated
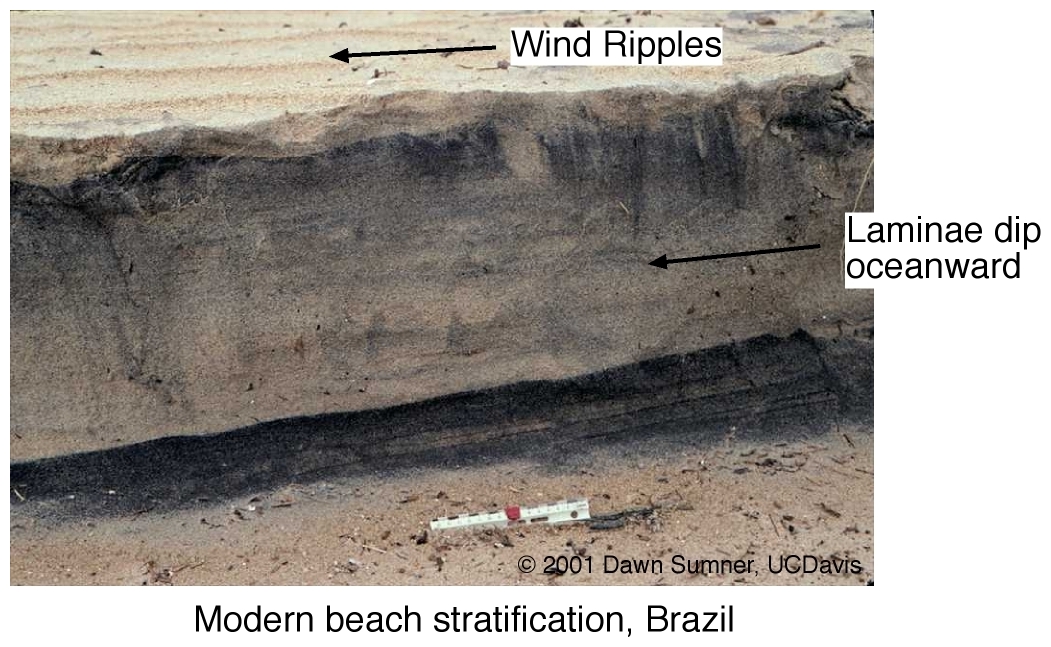
Figure \(\PageIndex{14}\): Modern Beach Stratification
Pescadero Beach
Pescadero Beach and estuary have complex facies changes over short distances. We visit this site on the second field trip.

Figure \(\PageIndex{15}\): Pescadero Beach
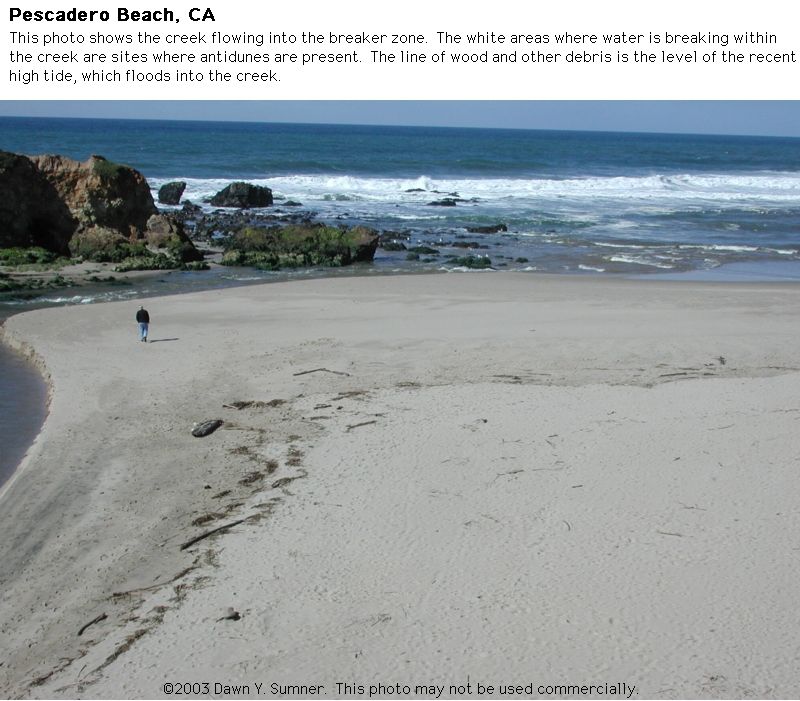
Figure \(\PageIndex{16}\): The creek flows into the breaker zone
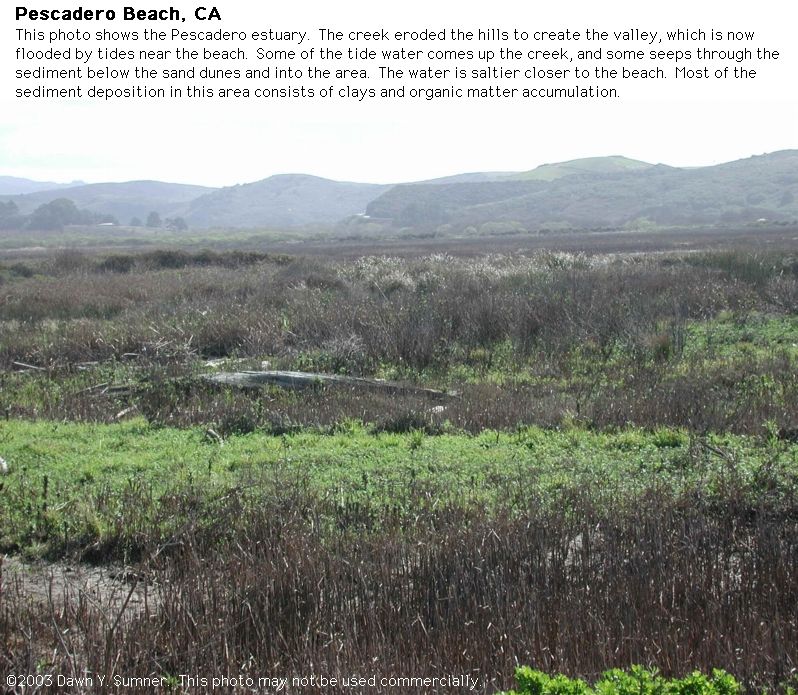
Figure \(\PageIndex{17}\): Looking across the estuary
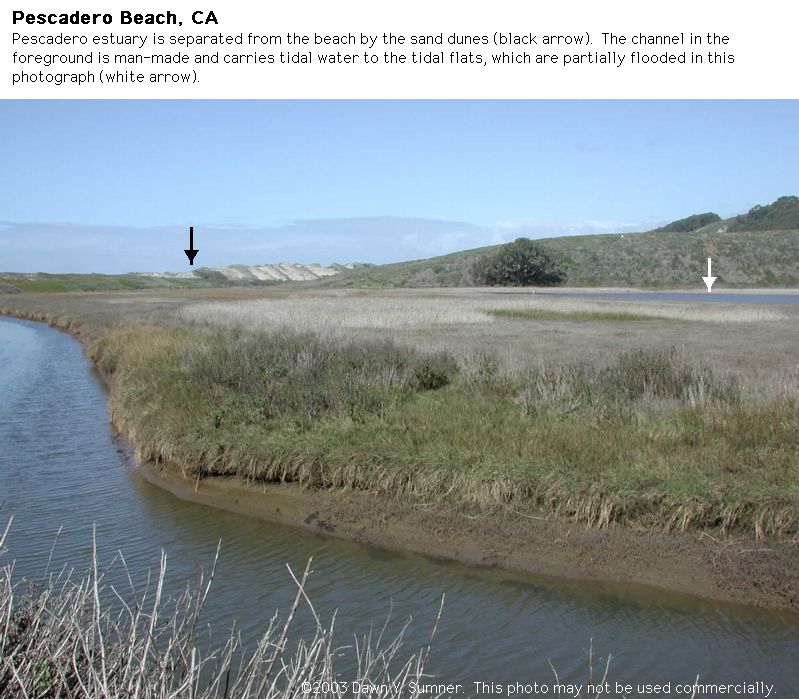
Figure \(\PageIndex{18}\): Looking towards the shoreline from the estuary

Figure \(\PageIndex{19}\): Dunes migrating in the creek
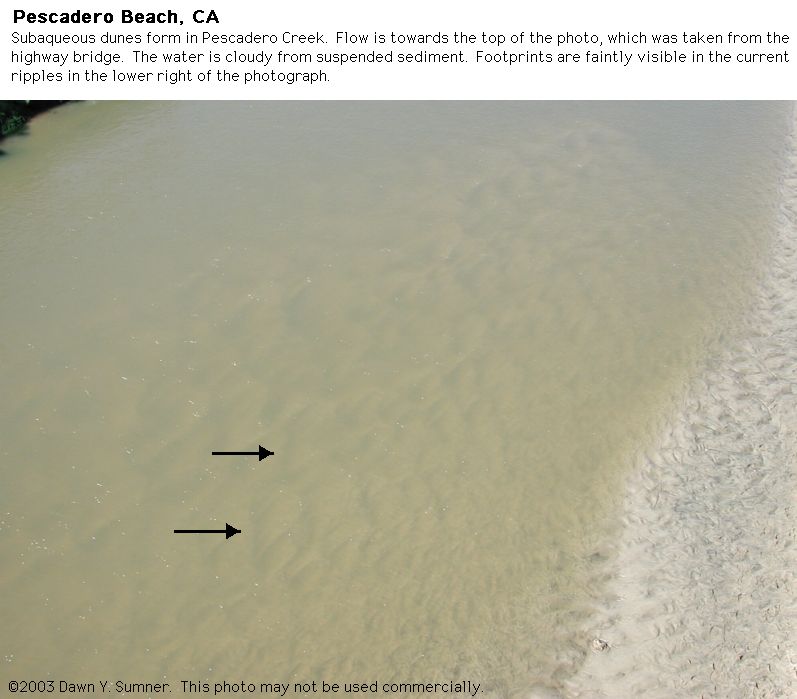
Figure \(\PageIndex{20}\): Dunes migrating in the creek
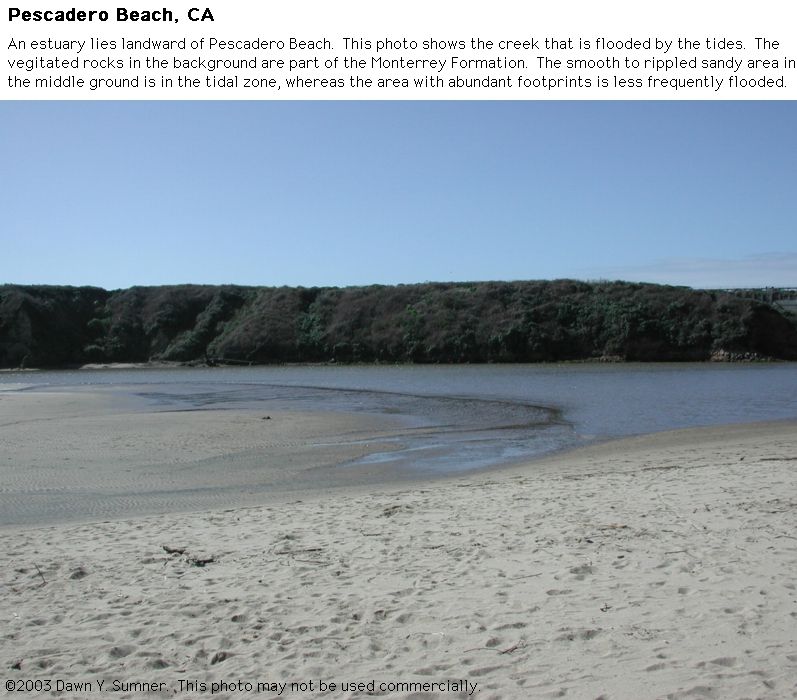
Figure \(\PageIndex{21}\): Tidal flats next to the creek channel
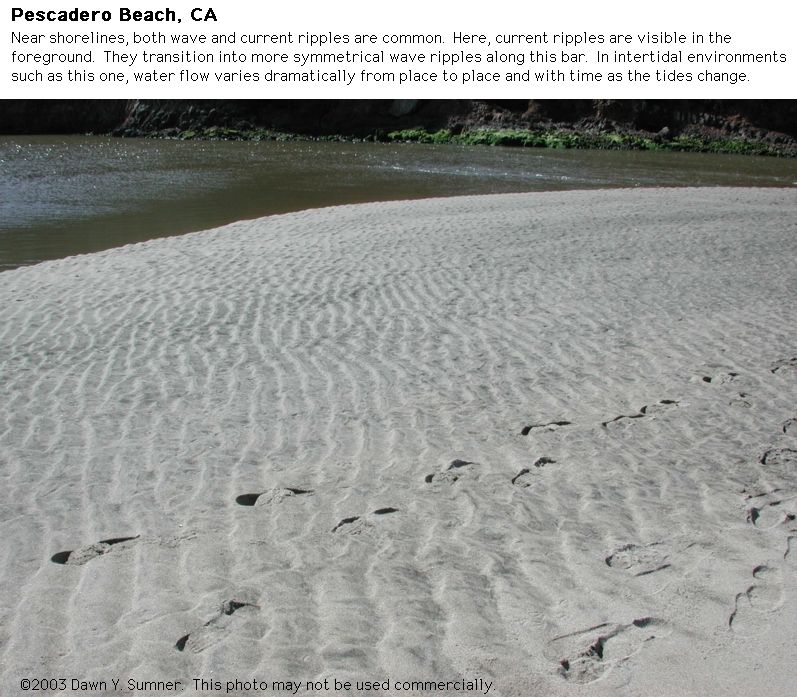
Figure \(\PageIndex{22}\): Ripples beside the creek
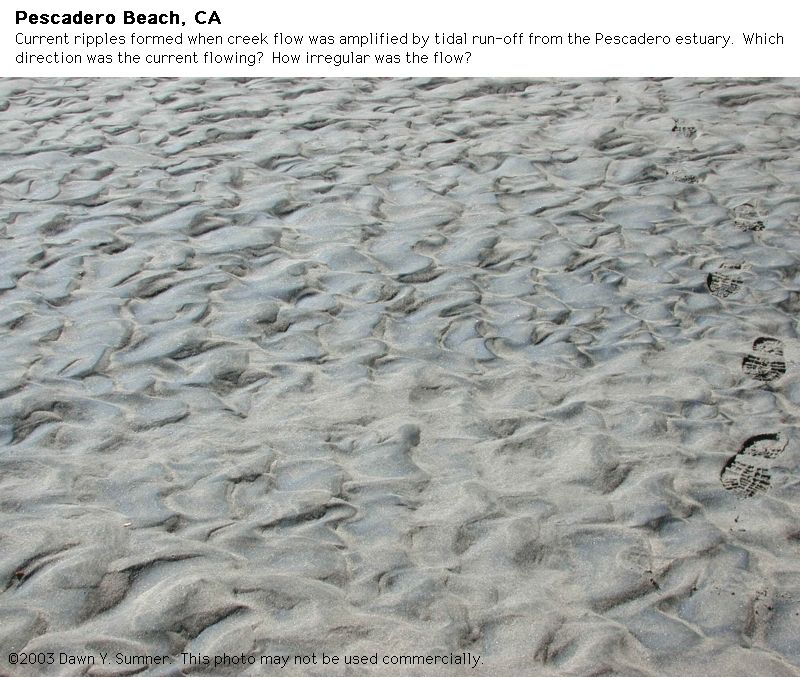
Figure \(\PageIndex{23}\): Current ripples beside the creek
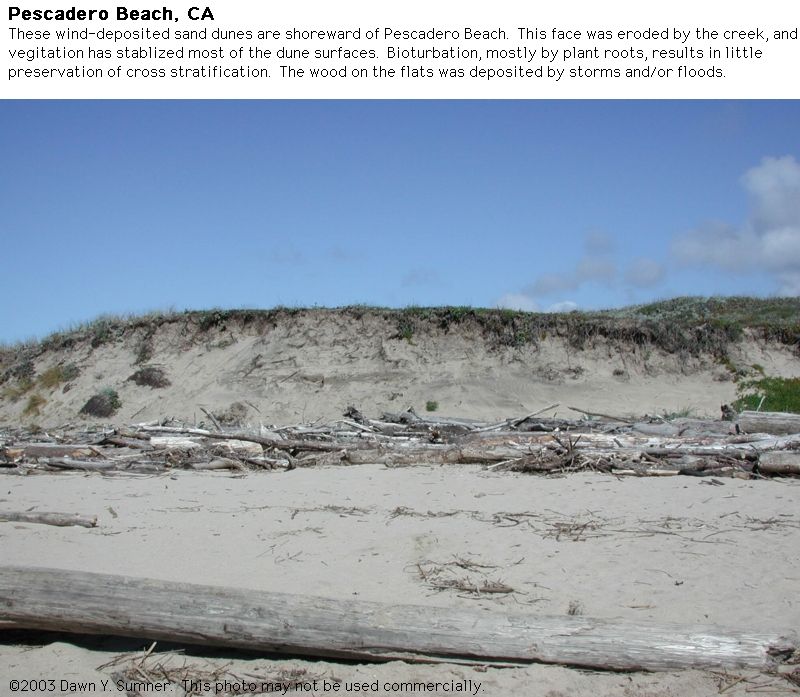
Figure \(\PageIndex{24}\): Eroded sand dunes
Return to Sedimentary Environments
Broome Town Beach
Broome Town Beach, Western Australia, is tide dominated, although small waves are present. In the summer, typhoons are common. The following photos were taken at low tide on the tidal flat in the winter.
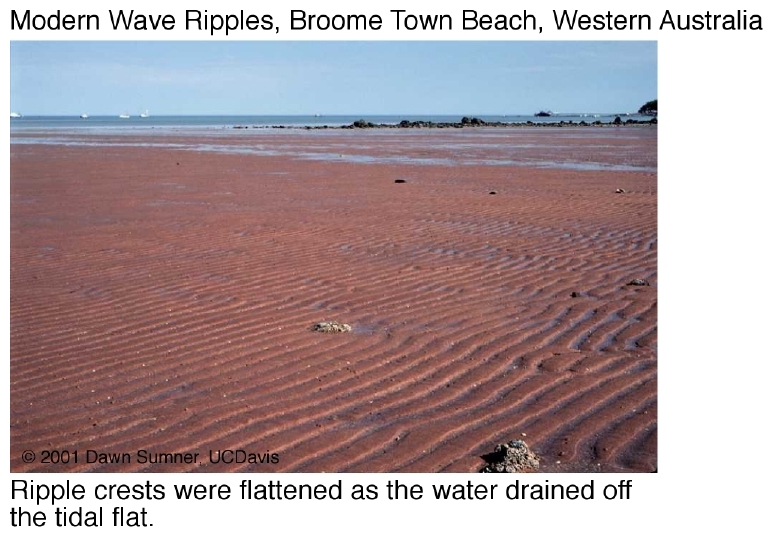
Figure \(\PageIndex{25}\): Modern Wave Ripples
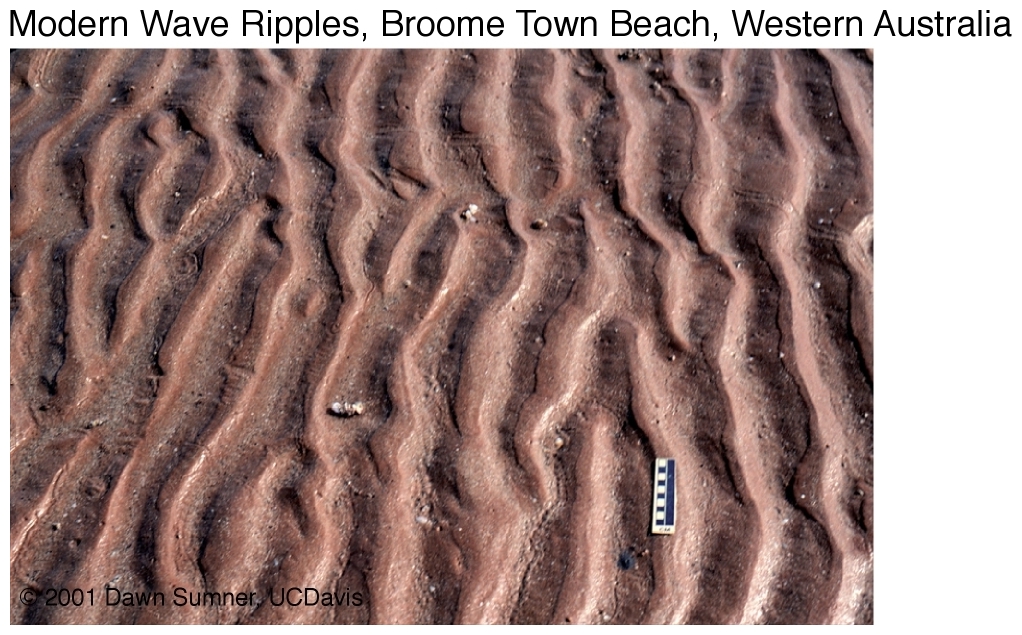
Figure \(\PageIndex{26}\): Modern Wave Ripples
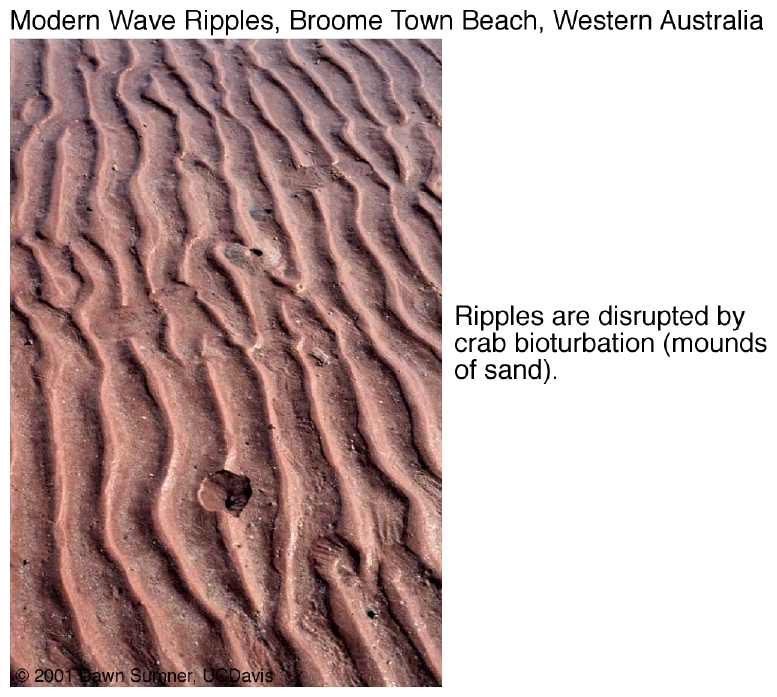
Figure \(\PageIndex{27}\): Modern Wave Ripples
Return to Sedimentary Environments
Derby
The coastline near Derby, Western Australia, is dominated by extremely high tides (almost 12 m tidal range), and waves are essentially absent in the protected Prince William Sound. Mangroves line the shore. The following photos were taken at an exceptionally low tide when the tidal bars were exposed.
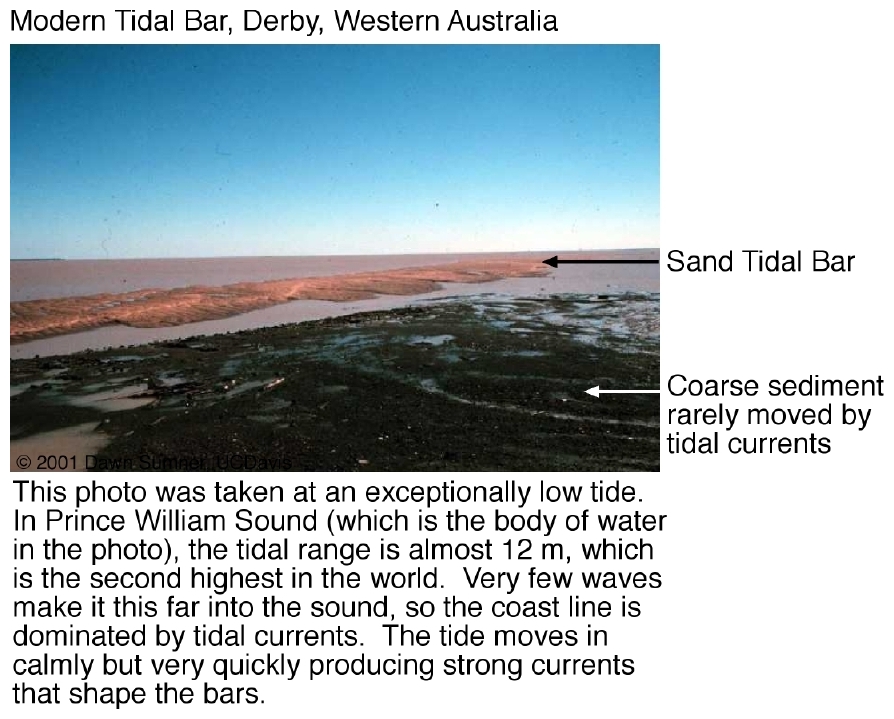
Figure \(\PageIndex{28}\): Tidal bar
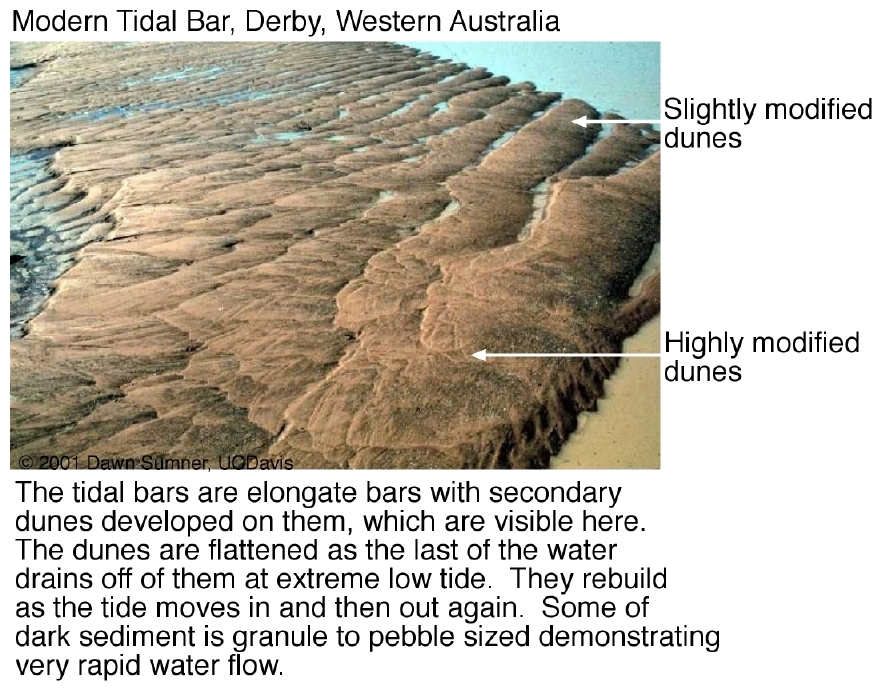
Figure \(\PageIndex{29}\): Tidal bar dunes
Return to Sedimentary Environments
Lake Louise
The sediment-rich creek that flows into Lake Louise, southern Canadian Rockies, creates a lacustrine delta, as seen in the following photographs.
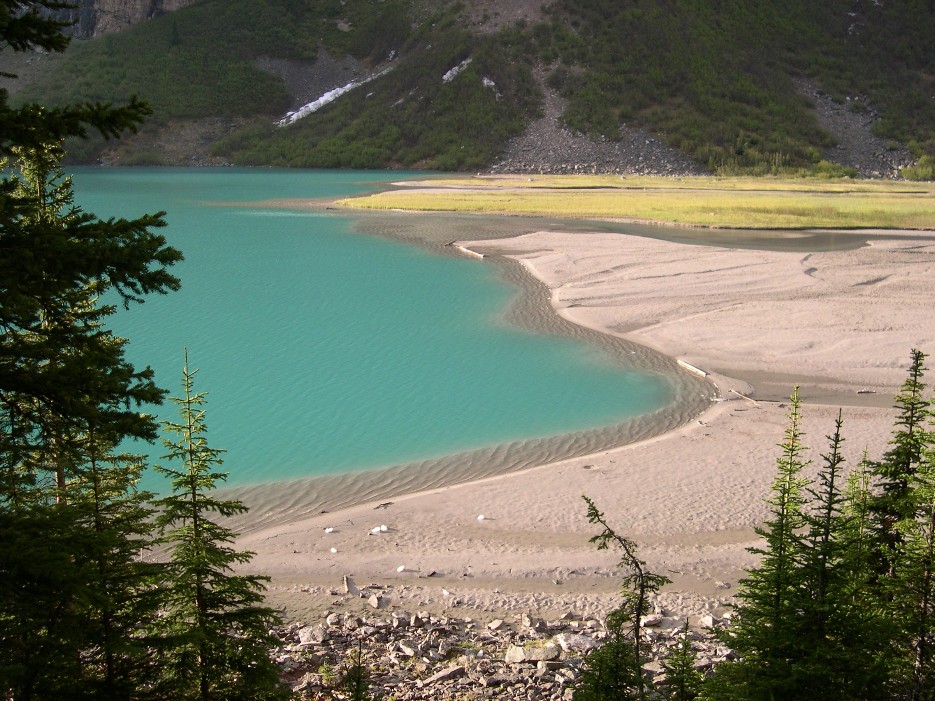
Figure \(\PageIndex{30}\): Lacustrine Delta
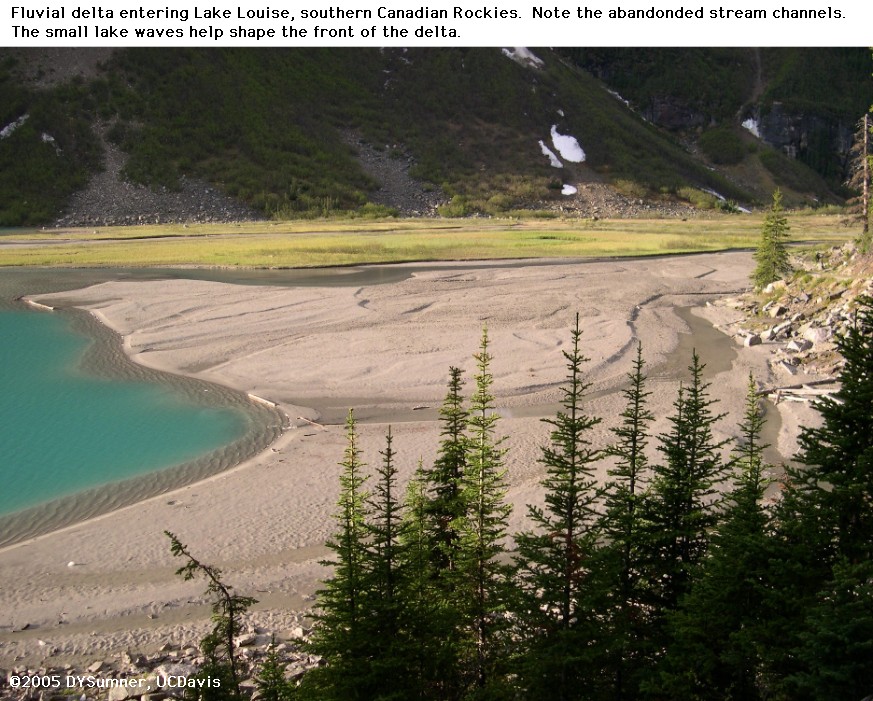
Figure \(\PageIndex{31}\): Lacustrine Delta
Return to Sedimentary Environments