
2.6: Google Earth Introduction
- Page ID
- 5464

Overview
Google Earth is a great tool to visualize and explore many of the geologic features that we will discuss in this class. This program is free and easy to use. This first Google Earth assignment will focus on familiarizing you with the program and some of the tools that we will use in later labs. Note that the optimal way to view geology is to go outside. Since that is not an option for an online class, the next best thing is using Google Earth. This is a practical and useful program that has many applications.
Note
Google Earth updates versions periodically. If this occurs the instructions in the labs for this chapter may refer to the older version of the program. If you think this has occurred please let your instructor know.
If Google Earth is not already installed on the computer you are using, then please do the following:
- Go to http://earth.google.com
- Click on the Download Google Earth tab at the top of the page, review the Privacy Policy, and click Agree and Download to download the latest version.
- Save the file to your desktop, open it and follow the instructions to install.
- Open Google Earth.
Before we begin the assignment, let’s first familiarize ourselves with Google Earth. Read each step and spend a few minutes trying things out, which will make things easier later. Also, note that the Mac and PC versions of Google Earth are a little different.
You will use this program extensively throughout the course. Take the time to learn how to navigate it now.
Step 1 – Navigation
Watch each of the tutorial videos at http://www.google.com/earth/learn/ beginner.html#navigation. It is important that you dedicate time to review these virtual resources to help you better understand Google Earth and its capabilities. These will be key to mastering the tool. Navigating in Google Earth can be done in two ways:
- First, you can use the Search panel in the upper left-hand side of the screen. Just type in a location, address, or coordinate and it will zoom into the position (give it a try now).
- The second approach is that you can also navigate manually:
- To move position you can left-click with the mouse and drag the map or click on the hand icon in the upper right corner.
- You can zoom in and out using the mouse wheel, by right-clicking and dragging the mouse up or down, or by sliding the lowest bar in the upper right corner.
- Click and hold the mouse wheel in order to rotate the map (left and right) or tilt the scenery (up and down). This can also be done using the arrows surrounding the eye icon in the upper right corner.
Along the bottom of the image it gives several important pieces of information:
- Latitude and Longitude
- Elevation in reference to sea level
- Eye altitude, which indicates how zoomed in or out you are.
For example, let’s check out Niagara Falls. In the Search panel in the upper left, type in Niagara Falls, NY. To better tell where the Falls are, you want to zoom out a little bit. Notice your eye altitude along the bottom right. Use the minus button for the zoom until you are at ~10,000’ eye altitude. Check your latitude (~43º 04’39”N – read as 43 degrees, 4 minutes, and 57 seconds North) and longitude (~79º 04’28”W). It will move as you move your cursor across the screen, as will your elevation. If you want to see a picture of the Falls, just click on one of the many photo icons to see one. Note that the river is headed in a general northerly route – you can zoom in close to see the actual Falls.
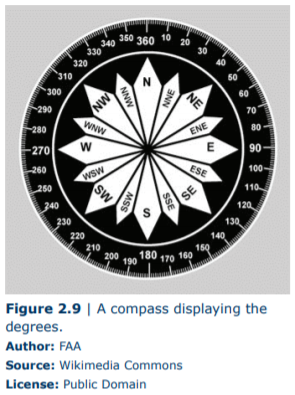
Also important to understand with navigation is the concept of bearing. A bearing is the compass direction as measured between two points. It can be expressed as an azimuth bearing in degrees between 0 and 360, as along a circle. 0 and 360 degrees would be north, 90 degrees would be east, 180 degrees would be south, and 270 degrees would be west (Figure 2.9).
Step 2 – Measuring
In order to examine features, we will need to be able to measure them, which is easily managed in Google Earth. Measuring is done using the Ruler Tool, which can be accessed either by clicking the ruler icon in the toolbar above the image or by selecting from the menu across the top Tools, then Ruler.
There are two options with the ruler tool, line, and path. The line option (which is the default option) gives the distance and direction between two points; notice the pull-down menu that gives 11 different options for units of measurements. To make a measurement, after you have selected the ruler tool, you simply click on two different points. The path option gives the distance for a set of two or more points giving the ability to measure a distance that isn’t a straight line.
Note
When measuring features you want to use the Map Length – using the ground length can lead to an incorrect answer.
Gradient will often be measured for this and future labs. Gradient is similar to the slope which indicates how steep or flat an area is. It is calculated as the difference in elevation divided by the horizontal distance. When calculating the gradient, maintain the same units in the numerator and denominator.
Gradient = change in elevation/horizontal distance
Let’s practice again at Niagara Falls. First move the image slightly higher to fully see the start of the white water, just before the Falls begin (do this by left-clicking the mouse and using the hand to move the image). With the eye altitude still at ~10,000’, let’s measure the distance across the river right at the start of the whitewater before the Falls (where the whitewater stops). First click your ruler icon, then select a point on one side of the river, then move your mouse straight across to the other side. In feet, this should measure ~4,800 feet (don’t stop at the island – measure all the way to the other river bank). Using the pull-down menu, you can change the feet to miles, and the result should be ~0.9 miles. Now let’s practice gradient across the actual Falls. Position your cursor over the actual Falls, and zoom in to an eye altitude of ~1,000 feet. Hold your cursor over the top of the Falls and record the elevation (remember, this is located along the bottom bar). Now move your cursor to the bottom of the Falls and record the elevation. The change in elevation (highest-lowest) will be your numerator. Use the Ruler tool to measure the distance between the two places – this will be your horizontal distance (the denominator). There will be variation in this answer depending on your exact spot along the Falls, but results should be similar to this:
Gradient = \(\frac{(500’ – 325’)}{75’} = \frac{175’}{75’} = 2.3\)
Step 3 – Changing the Options
For a few tasks it will be important to change some of the default settings on Google Earth in order to see a feature better or make your work easier. These changes can all be made by going to Tools in the menu bar across the top, then Options in the PC version (for the MAC, go to Google Earth, then Preferences).
- Changing the unit for Elevation – From the 3D view tab, in the middle of the box, there is a section entitled “Units of Measurement” that you can change between metric and English units.
- Exaggerating Features – Since differences in elevations are much smaller than geographic distances it is sometimes hard to see features. To exaggerate features (that is, make a mountain look taller than it actually is in order to see it better), click on the 3D view tab, in the lower-left side at the “Terrain” section of the box, look for “Elevation Exaggeration (also scales 3D buildings and trees)”. If you want to exaggerate a feature increase this value up to 3. To view the area without any exaggeration, return the value to the default of 1.